
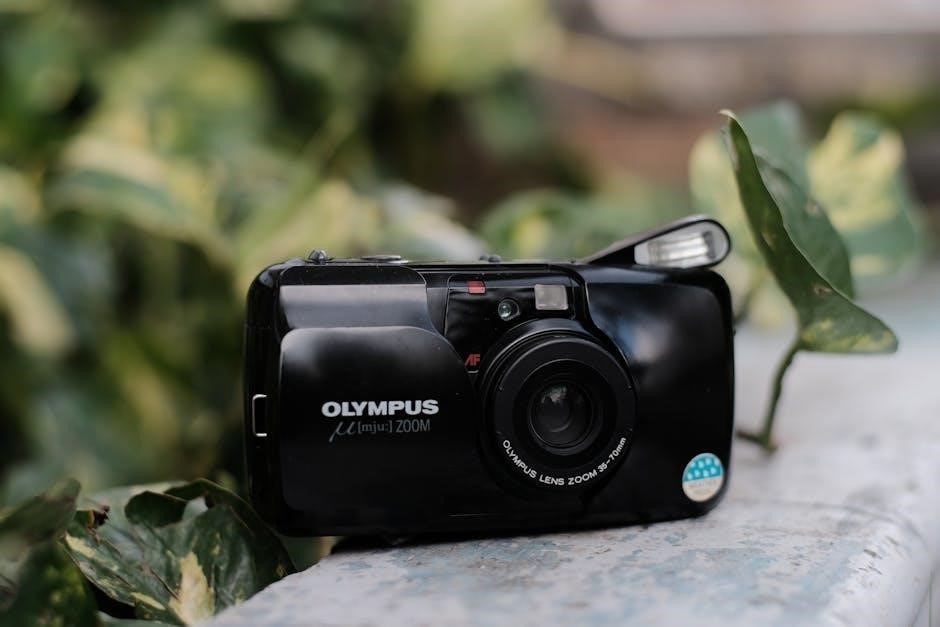
Olympus’s Tough TG-6 is a compact digital camera built for adventure, offering robust features and detailed instructions within its comprehensive manual.
The manual guides users through setup, operation, and advanced techniques, ensuring optimal performance in diverse environments.
Downloadable from the OLYMPUS website or via the OI.Share app, it’s a vital resource for maximizing the camera’s potential.
What is the Olympus Tough TG-6?
The Olympus Tough TG-6 is a rugged, waterproof compact digital camera designed for adventurers and enthusiasts. As detailed in its manual, it excels in challenging conditions, boasting shockproof, crushproof, and freezeproof capabilities.
This camera isn’t just durable; it’s packed with features, including high-resolution image capture and advanced macro photography options. The manual highlights its f/2.0 lens and versatile shooting modes, catering to both beginners and experienced photographers.
It’s a reliable companion for outdoor pursuits, offering detailed guidance within the manual for optimal performance and longevity.
Key Features and Benefits
The Olympus Tough TG-6’s manual details a wealth of features, starting with its exceptional durability – waterproof to 50ft, shockproof, crushproof, and freezeproof. Benefit from a bright f/2.0 lens for superior low-light performance and sharp images.
Advanced macro capabilities, explained in the manual, allow for stunning close-up photography. Field Sensor data, including GPS and altitude, enhances your shots. Wireless connectivity via the OI.Share app simplifies image transfer.
The manual emphasizes ease of use alongside advanced controls, making it ideal for all skill levels.
Intended Use and Target Audience
As outlined in the Olympus Tough TG-6 manual, this camera excels in adventurous scenarios – underwater photography, hiking, climbing, and any environment demanding ruggedness. It’s designed for outdoor enthusiasts, travelers, and anyone needing a reliable, compact camera.
The manual caters to both beginners with its Auto modes and experienced photographers utilizing Aperture and Shutter Priority. Its macro functions appeal to nature lovers and scientific observation.
Essentially, the TG-6 is for those who prioritize durability and versatility without sacrificing image quality, as thoroughly explained within its documentation.
Getting Started: Initial Setup
The Olympus Tough TG-6 manual details a straightforward setup process: unboxing, battery insertion, and memory card installation, preparing you for immediate use.
Unboxing and Component Check
According to the Olympus Tough TG-6 manual, upon opening the box, carefully verify all included components. You should find the TG-6 camera body itself, a USB cable for charging and data transfer, and a user manual detailing operation.
Additionally, check for the battery, and any warranty information or quick start guides. Inspect each item for any signs of damage incurred during shipping.
The manual emphasizes confirming the presence of all listed items to ensure a complete and functional product right from the start, preventing potential issues later.
Charging the Battery
The Olympus Tough TG-6 manual details the charging process. Connect the provided USB cable to the camera and a USB power source. A charging indicator lamp will illuminate, signifying the charging process has begun.
The manual notes that a full charge typically takes approximately 3.5 hours.
Avoid using the camera while it’s charging. Disconnect the cable once charging is complete. The manual also cautions against exposing the battery to extreme temperatures during charging, ensuring optimal battery life and performance.
Inserting the Battery and Memory Card
The Olympus Tough TG-6 manual provides clear instructions for battery and card insertion. First, ensure the camera is powered off. Open the battery/card compartment cover on the camera’s bottom.
Insert the battery, aligning the contacts correctly, until it clicks into place.
Next, insert a microSD card (sold separately) into the designated slot, label side up, until it clicks. Close the compartment cover securely, verifying it’s latched. The manual emphasizes proper closure for maintaining water resistance.
Basic Camera Operation
The Olympus Tough TG-6 manual details fundamental operations, including powering the camera on/off, navigating menus, and understanding the mode dial’s functions.
Powering On/Off the Camera
According to the Olympus Tough TG-6 manual, to power on the camera, simply slide the power switch located on the top panel towards the power symbol. The camera will initialize, displaying the shooting screen.
To turn the camera off, slide the same power switch back to the off position. The manual emphasizes ensuring the camera is fully powered down to conserve battery life when not in use.
Additionally, the manual notes that the camera may automatically power off after a period of inactivity, a feature configurable within the setup menu to optimize power management.
Understanding the Mode Dial
The Olympus Tough TG-6 manual details the functions of the mode dial, a key control for selecting shooting modes. Rotating the dial allows quick access to Auto, Program Auto (P), Aperture Priority (A), Shutter Priority (S), Manual, and various scene modes.
The manual clarifies that Auto mode is ideal for beginners, while P, A, and S offer greater creative control. Scene modes cater to specific shooting situations, like landscape or macro.
Referencing the manual is crucial for understanding each mode’s specific settings and capabilities, enabling users to tailor the camera to their photographic needs.
Navigating the Menu System
The Olympus Tough TG-6 manual provides a detailed guide to navigating the camera’s menu system. Accessed via the MENU button, the menu is organized into several categories, including shooting settings, camera settings, and setup options.
The manual explains how to use the directional buttons to scroll through menu items and make selections. It emphasizes the importance of understanding each setting to customize the camera to individual preferences.
Consulting the manual ensures users can efficiently locate and adjust settings for optimal image quality and camera functionality.
Shooting Modes Explained
The Olympus Tough TG-6 manual details various shooting modes, from fully automatic options for beginners to advanced modes like Aperture and Shutter Priority.
Understanding these modes, as outlined in the manual, unlocks creative control.
Auto Mode for Beginners
Auto Mode, thoroughly explained in the Olympus Tough TG-6 manual, is the simplest way to start capturing images immediately. The camera automatically selects optimal settings for exposure, focus, and white balance, ideal for users unfamiliar with photography concepts.
This mode eliminates the need to adjust complex parameters, allowing beginners to concentrate on composition and capturing the moment. The manual emphasizes that Auto Mode is suitable for a wide range of everyday shooting scenarios, delivering consistently good results with minimal effort. It’s a fantastic starting point for exploring the camera’s capabilities.
Program Auto Mode (P)
Program Auto (P) Mode, detailed in the Olympus Tough TG-6 manual, offers a balance between automatic convenience and creative control. While the camera automatically sets the aperture and shutter speed, users can adjust other settings like ISO, white balance, and exposure compensation.
The manual highlights that P mode is excellent for situations where you want some influence over the final image without fully manual control. It’s a step up from Auto, allowing for subtle adjustments to achieve desired effects, while still maintaining ease of use for intermediate photographers.
Aperture Priority (A) and Shutter Priority (S) Modes
The Olympus Tough TG-6 manual explains Aperture Priority (A) and Shutter Priority (S) modes for advanced control. In A mode, you select the aperture (f-stop) to control depth of field, while the camera sets the shutter speed. Conversely, S mode lets you choose the shutter speed to freeze or blur motion, with the camera adjusting the aperture.
The manual emphasizes these modes are ideal for specific creative effects. A is great for landscapes, and S for sports. Mastering these modes, as detailed in the guide, unlocks significant photographic potential.

Understanding Camera Settings
The Olympus Tough TG-6 manual details crucial settings like image quality, ISO, and white balance. Adjusting these, as the manual instructs, optimizes image capture.
Image Quality and Resolution
The Olympus Tough TG-6 manual thoroughly explains image quality and resolution options. Users can select from various file formats, including JPEG and RAW, impacting file size and editing flexibility.
The manual details how resolution affects image detail; higher resolutions are ideal for large prints or cropping, while lower resolutions conserve storage space.
Understanding these settings, as outlined in the manual, allows photographers to balance image quality with practical considerations, tailoring output to their specific needs and intended use.
The manual also clarifies the benefits of RAW format for post-processing adjustments.
ISO Sensitivity Settings
The Olympus Tough TG-6 manual dedicates a section to ISO sensitivity, explaining its impact on image brightness and noise levels. Lower ISO settings (e.g., ISO 100) are best for bright conditions, delivering cleaner images with minimal noise.
As light decreases, the manual advises increasing ISO to maintain shutter speed and avoid blur.
However, the manual cautions that higher ISO values (up to ISO 6400) introduce more noise. Understanding this trade-off, detailed in the manual, is crucial for achieving optimal image quality in various lighting scenarios.
Auto ISO is also explained.
White Balance Adjustment
The Olympus Tough TG-6 manual thoroughly explains white balance, crucial for accurate color reproduction. It details how different light sources (sunlight, shade, tungsten, fluorescent) affect color temperature.
The manual guides users through preset white balance modes for common scenarios, ensuring natural-looking colors.
Custom white balance, described in the manual, allows precise adjustment by referencing a white object.
The manual also covers Auto White Balance, offering convenience, but advises manual control for critical color accuracy, especially in challenging lighting conditions.
Utilizing the TG-6’s Toughness Features
The Olympus Tough TG-6 manual details its waterproof, shockproof, and freezeproof capabilities, enabling confident shooting in extreme conditions.
It explains depth ratings and proper care.
Waterproofing and Depth Rating
The Olympus Tough TG-6 manual thoroughly explains its impressive waterproofing features, stating the camera is submersible up to 50 feet (15 meters) without a housing.
It emphasizes the importance of checking seals and the battery/card compartment closure to maintain water resistance.
The manual cautions against using the camera in hot springs or chemically reactive liquids.
Detailed instructions are provided for rinsing the camera with fresh water after saltwater use, and for inspecting the O-rings for damage, ensuring continued reliable performance underwater.
Shockproof and Crushproof Capabilities
The Olympus Tough TG-6 manual details the camera’s robust build, capable of withstanding falls from up to 7 feet (2.1 meters) and supporting up to 100 kgf (220 lbf).
It clarifies that these specifications are tested under specific conditions and do not guarantee protection against all impacts.
The manual advises against intentional misuse or subjecting the camera to excessive force.
Proper handling and care, as outlined in the guide, are crucial for maintaining the camera’s shockproof and crushproof integrity during adventurous use.
Freezeproof Operation
The Olympus Tough TG-6 manual specifies the camera’s operational temperature range, confirming its ability to function in temperatures as low as 14°F (-10°C) without performance degradation.
However, the manual cautions that battery life may be reduced significantly in cold conditions.
It recommends keeping a spare, warmed battery readily available for extended shooting in freezing environments.
Condensation formation is also addressed, advising users to seal the camera in a plastic bag before moving to warmer temperatures to prevent internal damage.
Advanced Shooting Techniques
The Olympus Tough TG-6 manual details techniques like macro photography, Field Sensor data utilization, and Microscope Mode for experienced users seeking creative control.
Macro Photography with the TG-6
The Olympus Tough TG-6 manual extensively covers its impressive macro capabilities. This camera excels at extreme close-up photography, allowing focus as close as 1cm without needing additional lenses.
The manual explains utilizing the Microscope Mode for incredibly detailed images, and provides guidance on proper lighting and focus techniques for optimal results. It details how to leverage the camera’s settings to capture stunning macro shots of flowers, insects, and other small subjects.
Understanding the manual’s instructions unlocks the full potential of the TG-6’s macro features, enabling users to explore a hidden world of detail.
Utilizing Field Sensor Data
The Olympus Tough TG-6 manual details how to effectively use its integrated Field Sensor system. This feature records data like altitude, water depth, temperature, and compass direction directly onto your images.
The manual explains accessing and displaying this information, enhancing your photos with valuable contextual data. It guides users through setting up and calibrating the sensor for accurate readings.
Understanding how to utilize Field Sensor Data, as outlined in the manual, adds a unique dimension to your photography, perfect for documenting outdoor adventures and scientific observations.
Using the Microscope Mode
The Olympus Tough TG-6 manual thoroughly explains the camera’s unique Microscope Mode, enabling extreme close-up photography. This mode allows capturing incredibly detailed images of tiny subjects, magnifying them significantly.
The manual details optimal lighting techniques and focusing methods for achieving sharp, clear microscopic images. It guides users through utilizing the dedicated Microscope Stand accessory for stable shooting.
Mastering Microscope Mode, as described in the manual, unlocks a fascinating world of miniature details, ideal for scientific observation and artistic exploration.

Connectivity and Data Transfer
The Olympus Tough TG-6 manual details connecting to smartphones via the OI.Share app, utilizing Wireless LAN, and transferring images to computers efficiently.
Connecting to a Smartphone (OI.Share App)
The Olympus Tough TG-6 manual provides detailed steps for seamless smartphone connectivity using the OI.Share application. This app, available for both iOS and Android, enables wireless image transfer and remote camera control.
The manual guides users through the initial pairing process, ensuring a stable connection for quick and easy photo and video sharing.
OI.Share also facilitates geotagging images using the smartphone’s GPS, and allows remote live view and shutter release, enhancing creative possibilities. Detailed troubleshooting tips are included within the manual for resolving connection issues.
Wireless LAN and GPS Functionality
The Olympus Tough TG-6 manual thoroughly explains the camera’s built-in Wireless LAN and GPS capabilities. These features enable convenient image transfer to smartphones and computers without cables, as detailed in the manual.
GPS functionality allows for geotagging photos, recording location data for travel photography. The manual stresses the importance of disabling these features in areas where their use is prohibited.
Detailed instructions cover setup, connection, and troubleshooting, ensuring users can effectively utilize these wireless functionalities for enhanced shooting experiences.
Transferring Images to a Computer
The Olympus Tough TG-6 manual provides clear guidance on transferring images to a computer. Users can connect the camera directly via USB cable, treated as an external storage device, as explained in the manual.
Alternatively, images can be transferred wirelessly using the OI.Share smartphone app, then synced to a computer. The manual details step-by-step instructions for both methods, ensuring a smooth data transfer process.
It also covers file formats and folder structures for easy organization and management of your photos on your computer.

Troubleshooting Common Issues
The Olympus Tough TG-6 manual offers solutions for typical problems like power failures, image quality concerns, and connectivity glitches.
Refer to the manual for detailed troubleshooting steps to resolve these issues efficiently.
Camera Not Powering On
If your Olympus Tough TG-6 fails to power on, the manual suggests several checks. First, ensure the battery is fully charged and correctly inserted, verifying proper polarity.
Next, confirm the battery compartment lid is securely closed; the camera won’t operate if it’s not. Try a different, known-good battery if available.
Also, check the memory card – a faulty card can sometimes prevent startup. Finally, consult the manual’s troubleshooting section for a complete list of potential causes and solutions, including resetting the camera.
Image Quality Problems
If experiencing poor image quality with your Olympus Tough TG-6, the manual advises checking several settings. Verify the image quality setting isn’t set to a low resolution or highly compressed format.
Adjust the ISO sensitivity; higher ISOs introduce more noise. Ensure correct white balance is selected for the lighting conditions.
Clean the lens with a soft cloth. The manual also details how to utilize the camera’s various shooting modes and settings to optimize image clarity and sharpness for different scenarios;
Connectivity Issues
The Olympus Tough TG-6 manual details troubleshooting steps for connectivity problems. First, ensure Bluetooth and/or Wi-Fi are enabled on both the camera and your smartphone. Confirm the OI.Share app is up-to-date.
Disable and re-enable wireless LAN and GPS, as the manual cautions against their use in prohibited areas.
Restart both devices. Check for interference from other wireless signals. The manual also provides specific pairing instructions and guidance on resolving common connection errors.
Maintaining Water Resistance
The Olympus Tough TG-6 manual emphasizes checking seals and O-rings regularly. Proper battery and card compartment closure is crucial for continued waterproof performance.
Checking Seals and O-Rings
The Olympus Tough TG-6 manual details the importance of regularly inspecting the camera’s seals and O-rings to maintain its waterproof capabilities. Carefully examine the areas around the battery and card compartment, as well as any other access points, for signs of damage, cracks, or debris accumulation.
Ensure the O-rings are properly seated and free from cuts or distortions. If any issues are detected, consult the manual for guidance on replacement or professional servicing. Consistent inspection, as outlined in the manual, is vital for preserving the camera’s water resistance during underwater adventures.
Proper Battery and Card Compartment Closure
The Olympus Tough TG-6 manual emphasizes the critical role of securely closing the battery and memory card compartment to maintain waterproofing. Ensure the compartment door clicks firmly into place, and the orange seal is visible, indicating a proper closure.
Never force the door shut; if it doesn’t close easily, recheck the battery and card insertion. The manual warns against using the camera if the seal isn’t visible, as this compromises water resistance. Following these steps, detailed in the manual, is essential for safe underwater operation.
Cleaning and Care Instructions
The Olympus Tough TG-6 manual details specific cleaning procedures to preserve its functionality and ruggedness. After underwater use or exposure to harsh conditions, rinse the camera thoroughly with fresh water, ensuring all salt or debris is removed.
Use a soft, damp cloth to clean the exterior; avoid abrasive cleaners or solvents. The manual advises against disassembling the camera for cleaning. Regularly inspect the seals and O-rings, as outlined in the manual, for damage, ensuring continued water resistance and optimal performance.